How do I enable AI Lens for my team?
Last updated: September 1, 2026
AI Lens needs to be turned on at the team level by Ovida, then individual user roles within the team can be granted access.
Here's a video guide for this article.
AI Lens delivers near-human-level feedback on your meetings using various analysis rubrics. It's a paid feature that requires two things to be in place for a user to see it:
AI Lens is enabled for their team
Their user role has been granted access to AI Lens
Step 1: Enable AI Lens for your team
AI Lens isn't enabled by default. To check whether it's enabled for your team:
Go to Settings (bottom left of the screen) > Joined Teams > click your team name > Roles and Permissions (on the right side).
If the AI Lens checkboxes are greyed out, AI Lens isn't enabled for your team.
To request it, email support@ovida.org.
Step 2: Grant access to user roles
Once AI Lens is enabled for your team, you control which user roles can see it.
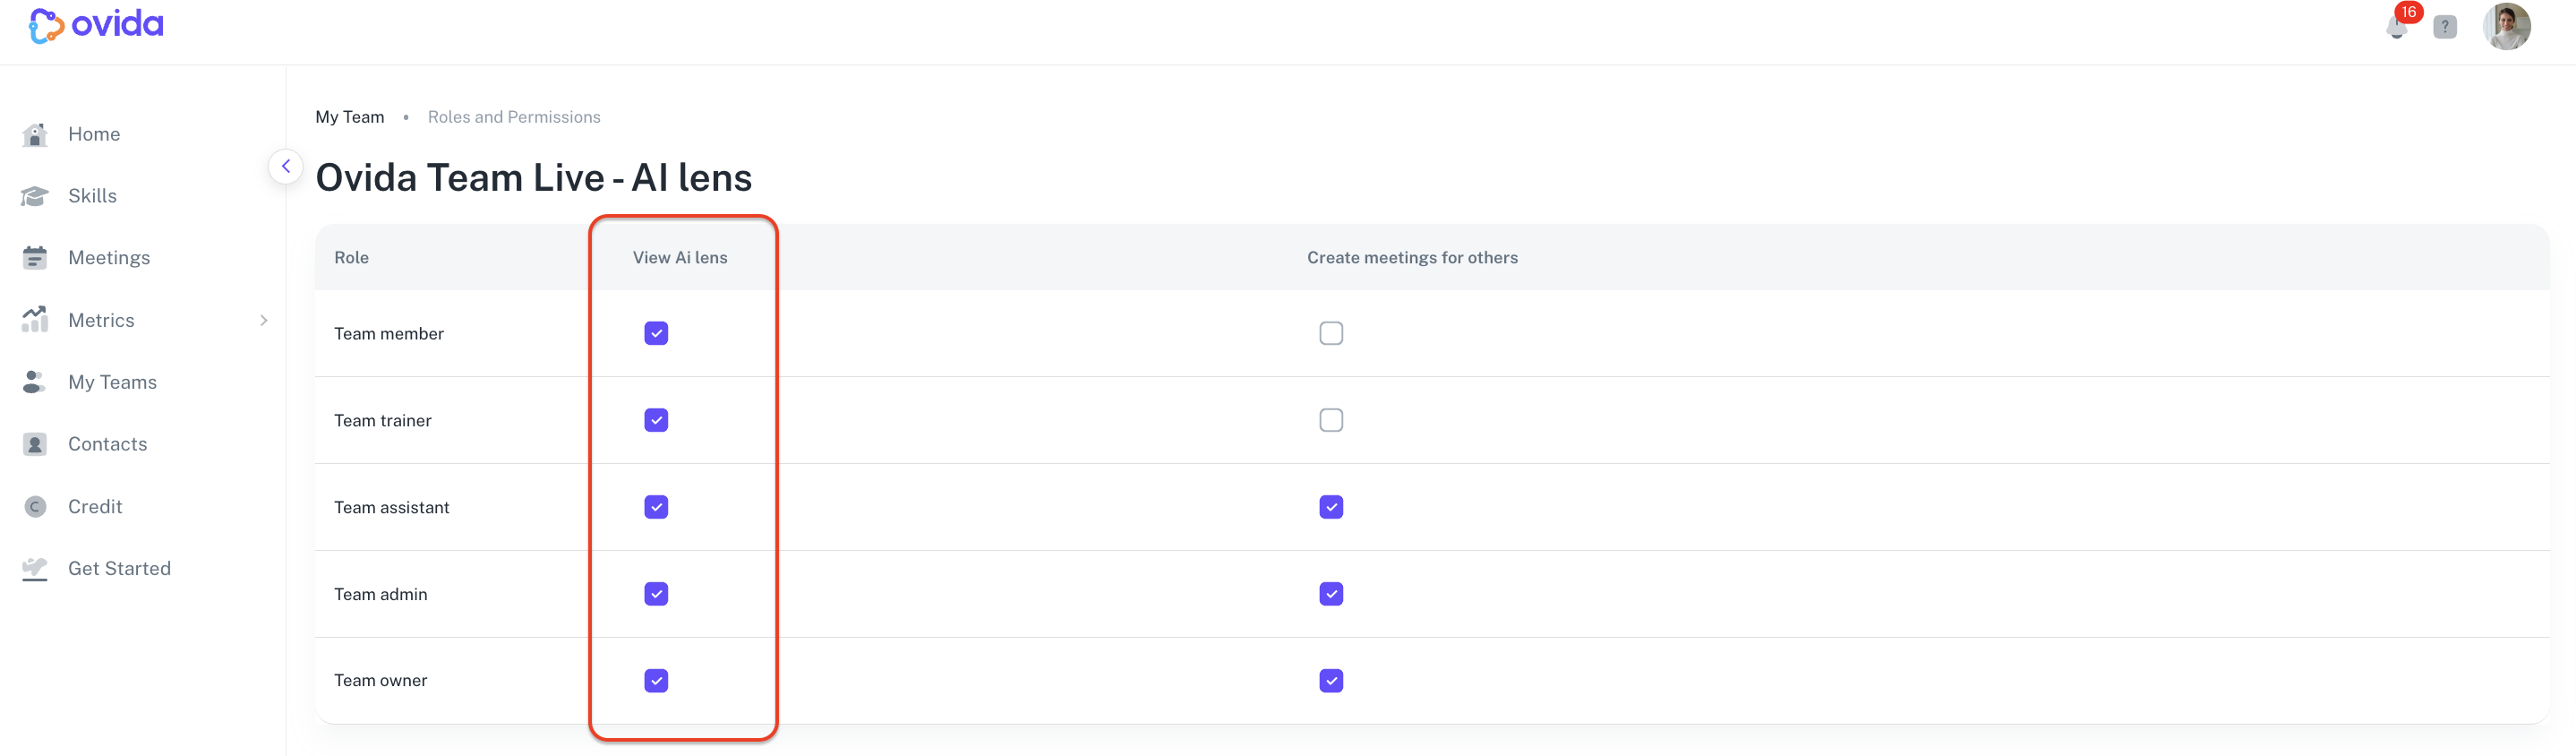
Go to Settings (bottom left of the screen) > Joined Teams > click your team name > Roles and Permissions (on the right side).
Tick the AI Lens box next to the user roles you want to have access.
Each user in your team is assigned a role. Users in roles with the AI Lens box ticked will see AI Lens output on their meetings.
A few things to know about AI Lens processing
AI Lens processing only runs on meetings allocated to a team that has AI Lens enabled. Make sure the meeting is allocated to the right team.
AI Lens runs on completion of a meeting. It won't backfill past meetings automatically.
For older meetings that pre-date AI Lens being enabled for your team, contact support@ovida.org. We can run AI Lens manually for those.