How do I set up my camera and microphone for Ovida?
Last updated: May 21, 2026
The first time you log in, Ovida runs a quick device check to make sure your camera, microphone, and connection are ready for meetings. It takes about a minute. Skipping it is fine, but doing it now saves troubleshooting later.
Steps to Get Started
Click "Get Started" on the left-hand side menu.

The "Get Started" menu item is located at the top of the left-hand navigation panel.
On the Get Started page, click "Test video setup" to begin checking your camera and microphone.
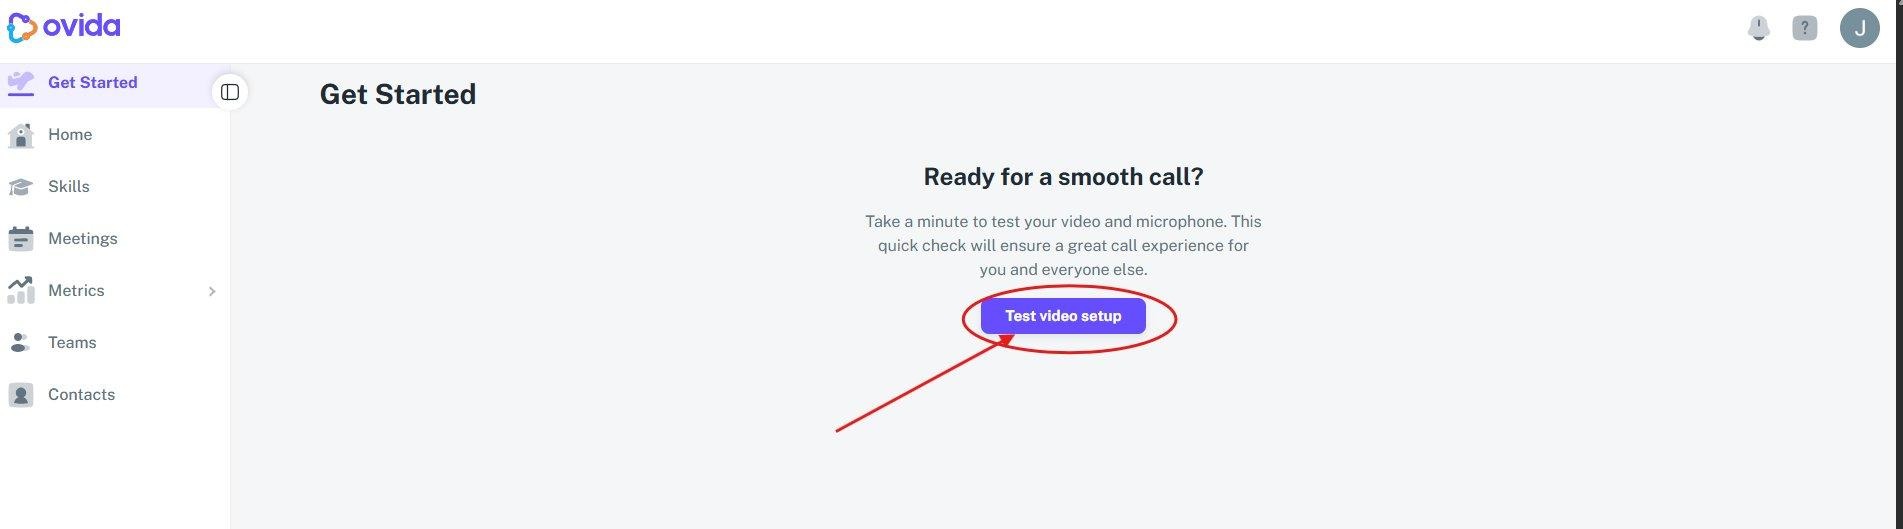
Click "Test video setup" to launch the setup wizard.
Click "Get started" on the welcome screen. You will then be prompted to check and grant permissions for your camera and microphone — click "Request permissions" and allow access when your browser asks.
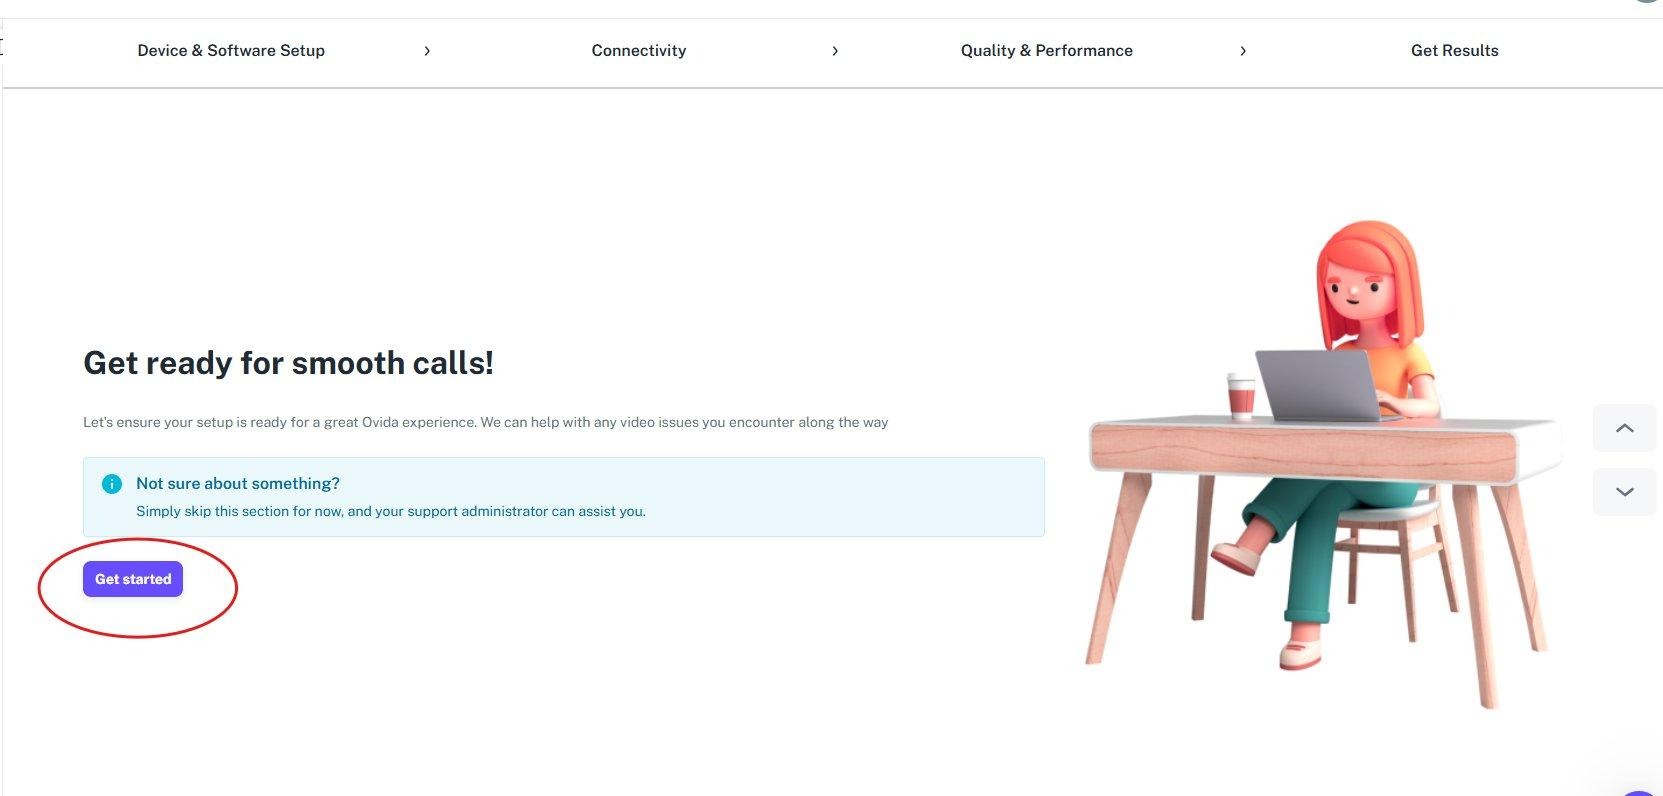
Click "Get started" to begin the setup process.
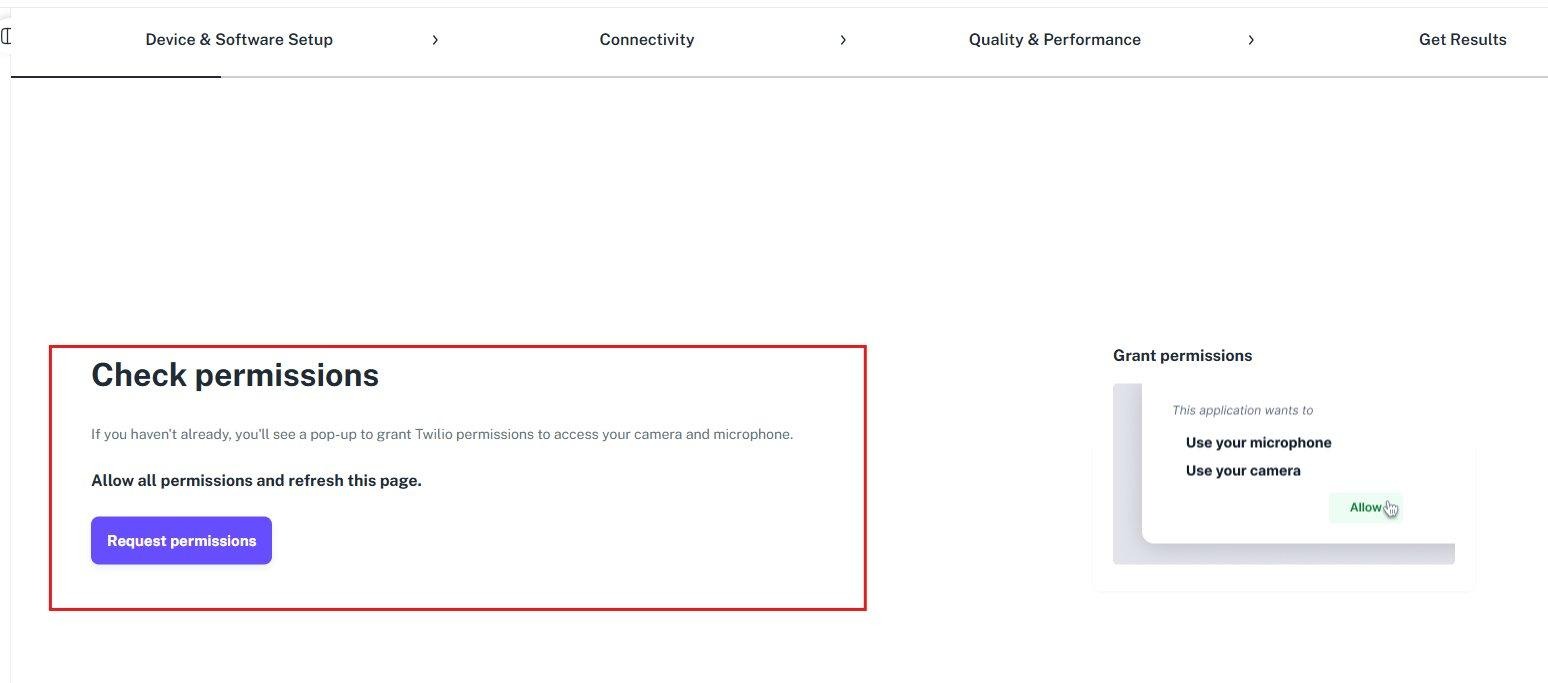
"Check permissions" screen — click "Request permissions" and allow your browser to access your camera and microphone.
💡 Tip: If you don't see a pop-up, check your browser's address bar for a blocked permissions icon and click it to allow access manually.
Set up your video and audio. Move in front of your camera to confirm your video is working, then record a short audio clip to check your microphone and speakers.

"Let's see your video!" — confirm your camera is working and click "Yes, my video looks good" to proceed.

"Test your audio" — record a clip and play it back to verify your microphone and speakers are working correctly.
Once all checks pass, you will see a confirmation that your browser is supported and that the connection is established. Click "Next" and you're all set — you can now start using the Ovida platform!
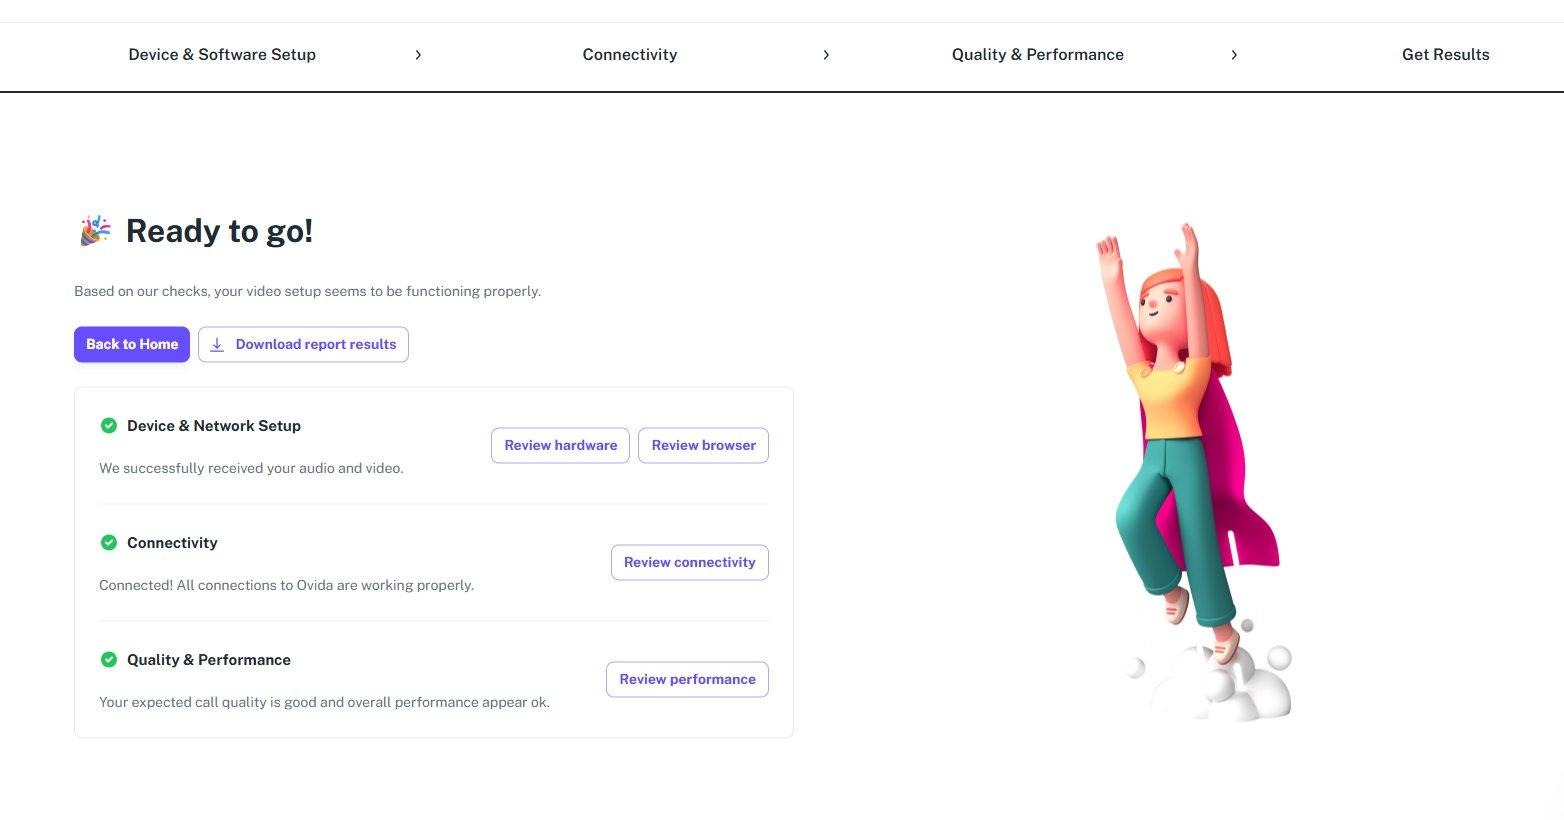
"Ready to go!" — all checks passed. Your device and network are confirmed to be working properly with Ovida.
If any step shows an issue, you can review the individual sections (hardware, browser, connectivity, or performance) using the review buttons on the results page. Your support administrator can also assist if needed.