How do I upload a meeting recording?
Last updated: September 1, 2026
Upload a pre-recorded audio or video file to get it transcribed and analysed by Ovida.
From the Meetings page, click Upload meeting file to add an audio or video file you've already recorded. Ovida will transcribe it and run the same analysis you'd get from a meeting recorded in Ovida.
Here's a video guide for this article.
Looking to upload a Zoom or Teams recording of a meeting with someone else? That's a different scenario with privacy and quality considerations. See "Can I upload Zoom or Teams recordings to Ovida?"
Before you upload
Most common audio and video formats are supported, but MOV files are not. If your recording is a MOV file (common for iPhone and QuickTime recordings), convert it to MP4 first. Audio files upload faster.
Every uploaded file is automatically scanned for viruses and malware before processing begins.
Exactly two speakers per file. If Ovida cannot find two distinct speakers it will stop and offer Try again, which returns you to the upload step so you can choose a different file.
You'll need a name or email to identify the other person.
Steps
On the Meetings page, click Upload meeting file. You can also start an upload from the Add meeting dialog on your Skills page.
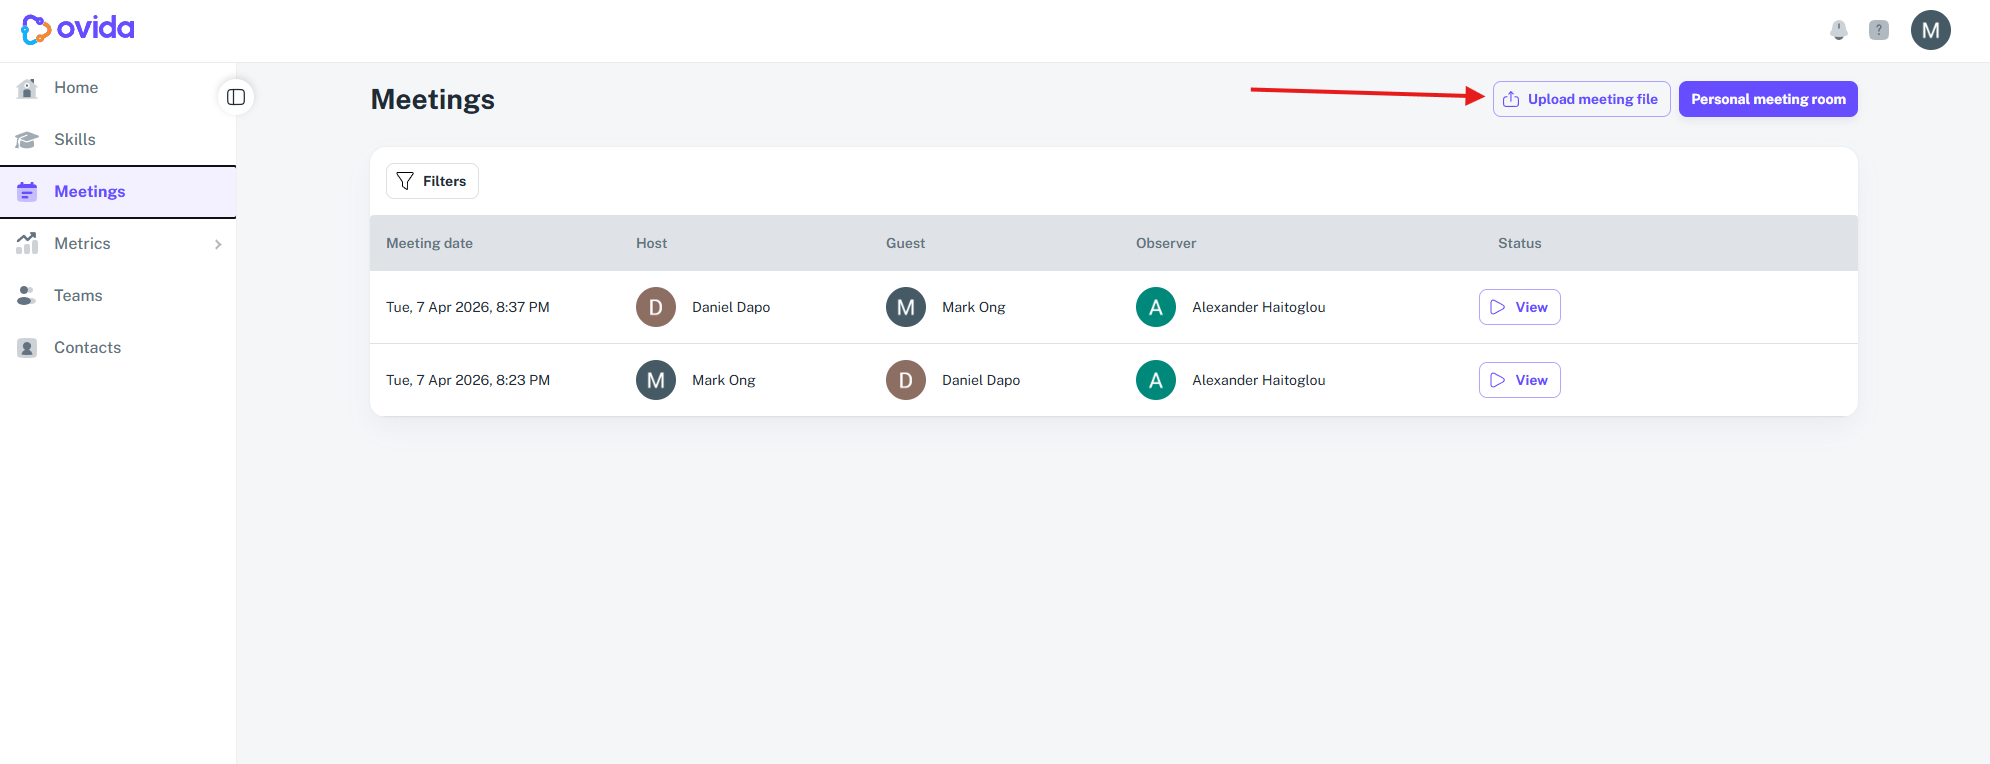
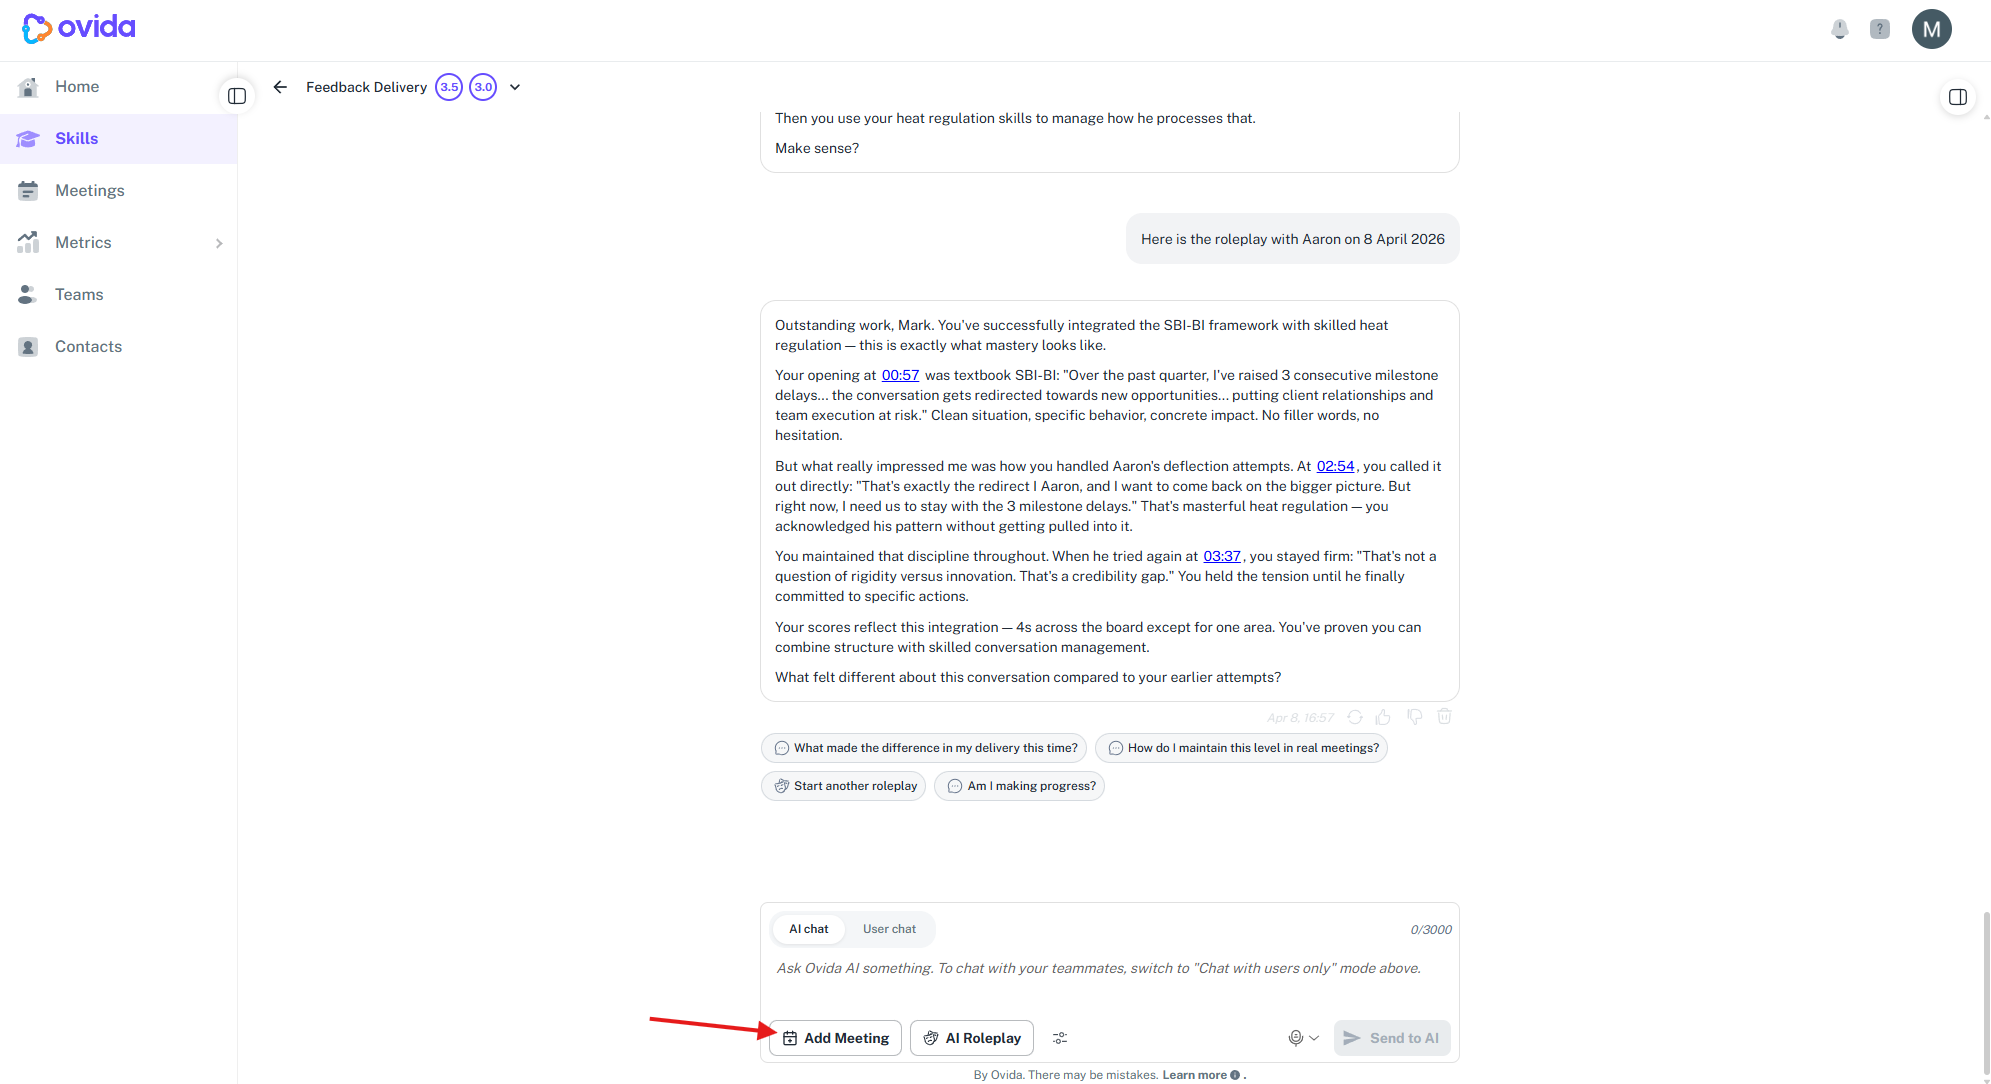
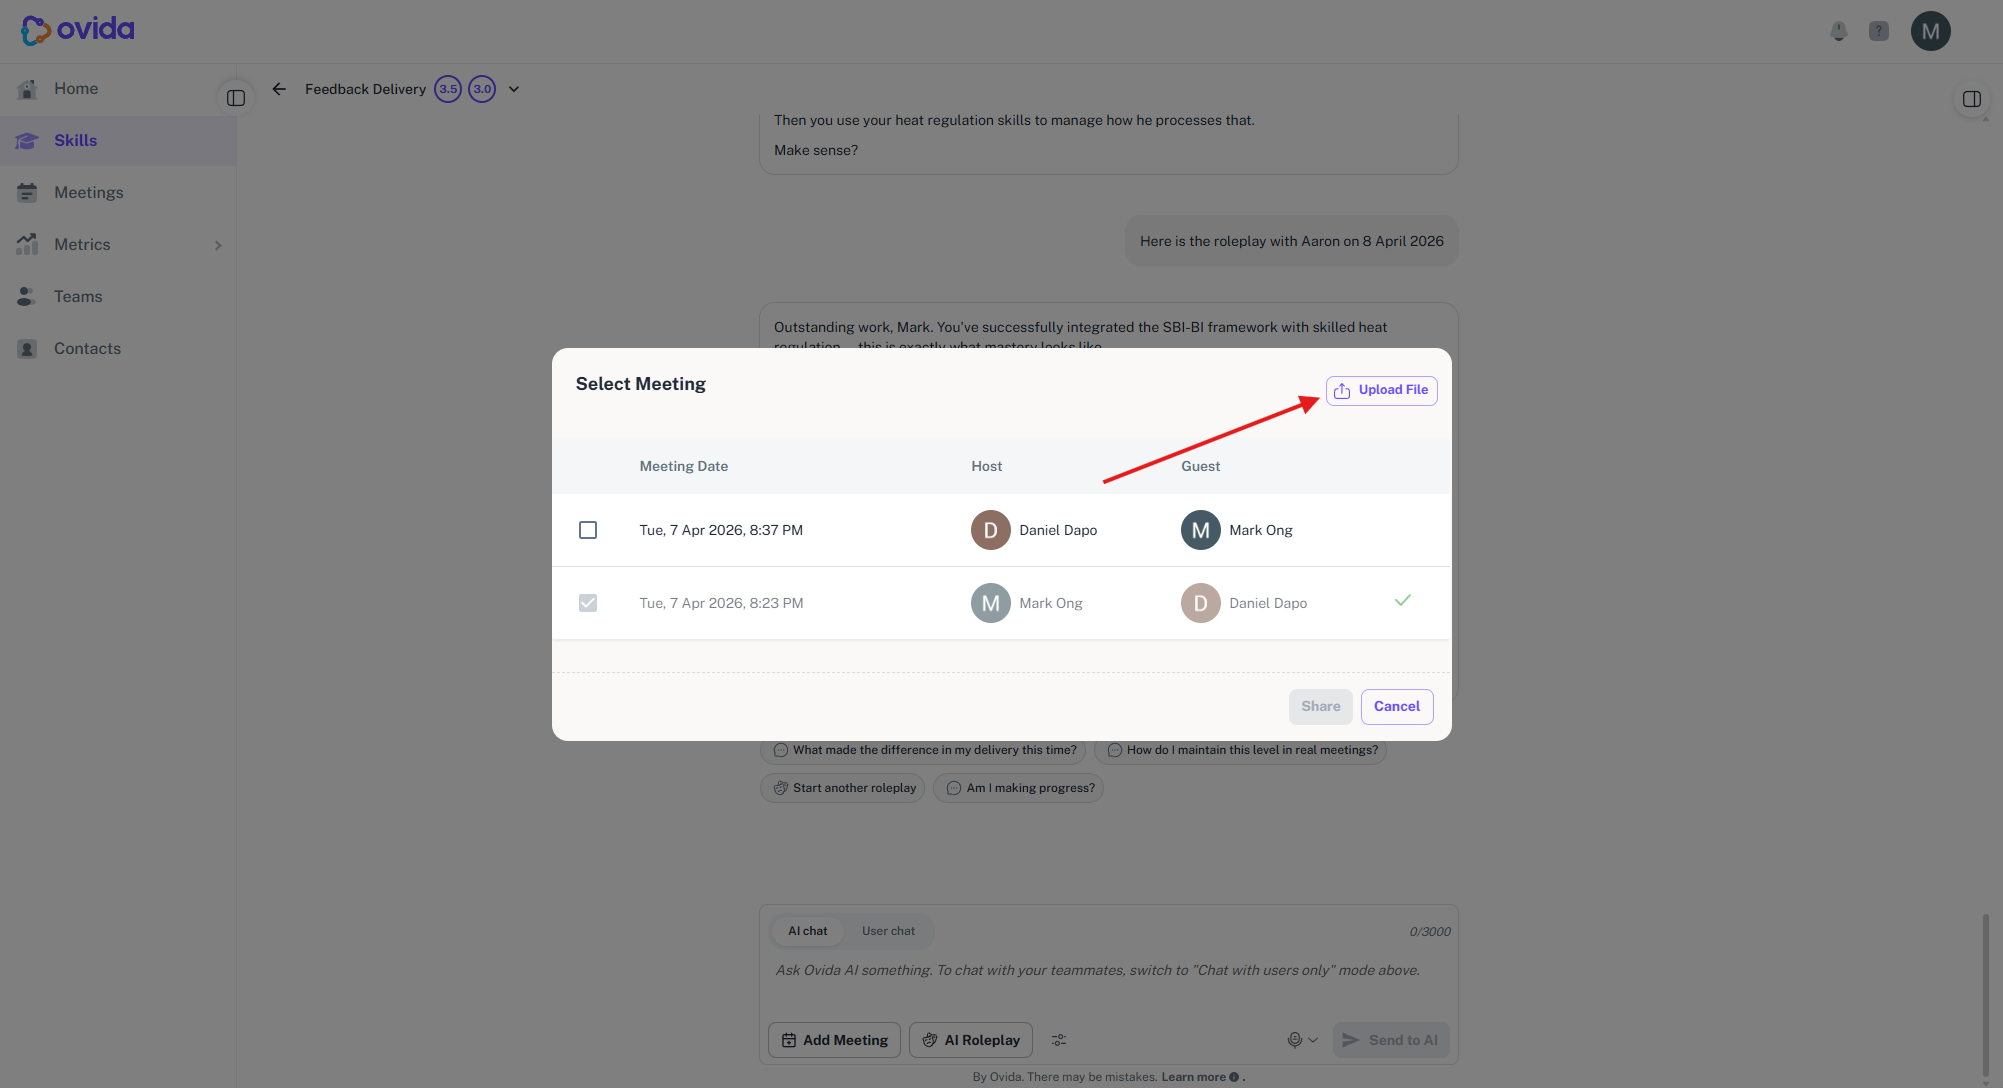
Select the audio or video file you want to upload (MOV files cannot be selected).
While Ovida transcribes the file, Ovida scans the file for viruses and malware after it uploads. You will see a scanning status; this usually takes only a few seconds. If the file fails the scan, the upload stops and an error is shown.
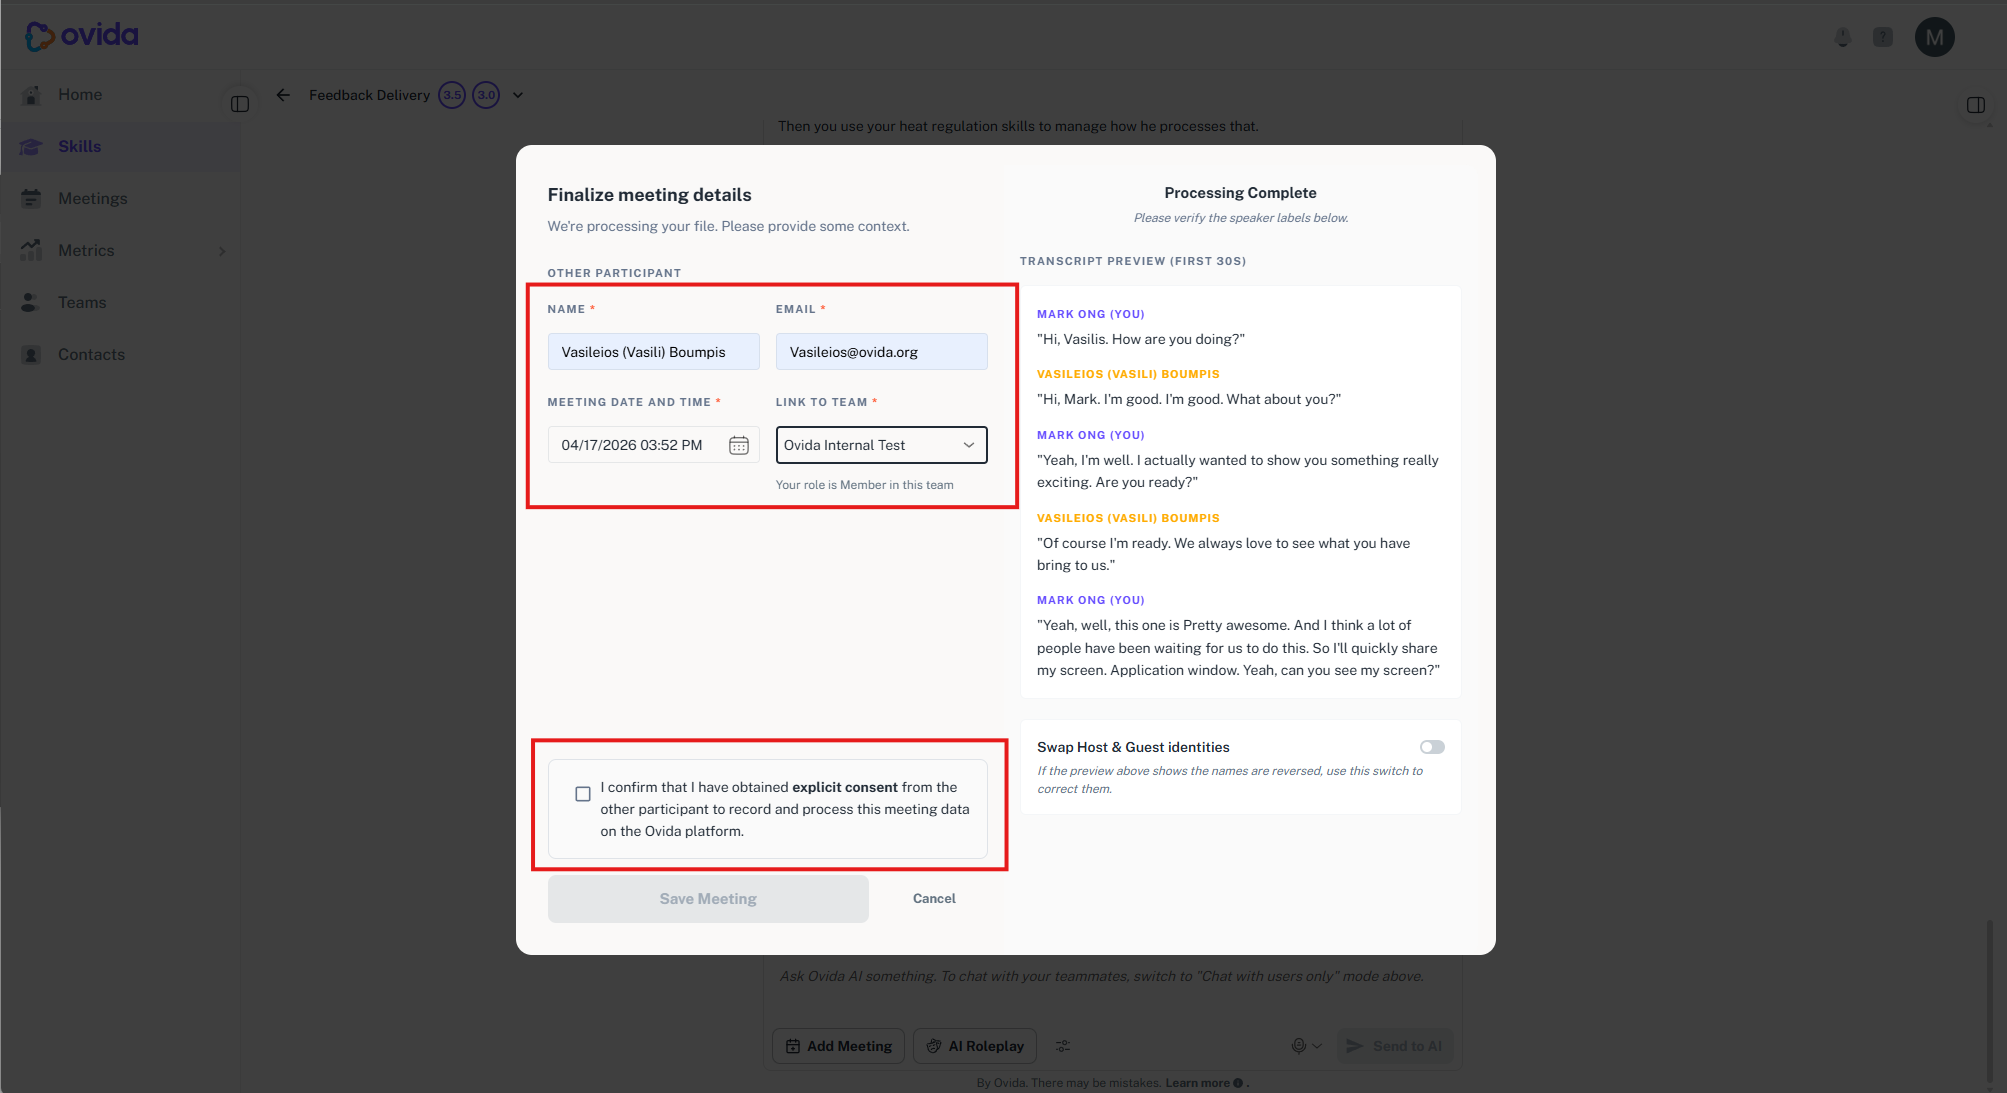
While Ovida transcribes the file, fill in the details:
Enter a name or email for the other participant
ℹ The email you enter is stored for your records only. The other participant is not notified or emailed when you submit this form.
Confirm the meeting date and time
Select a team to link the meeting to
Agree to the terms, including consent for the other participant's data
Wait for the progress bar to complete.
Check the speaker names are correct. If they're the wrong way around, click Switch speakers.
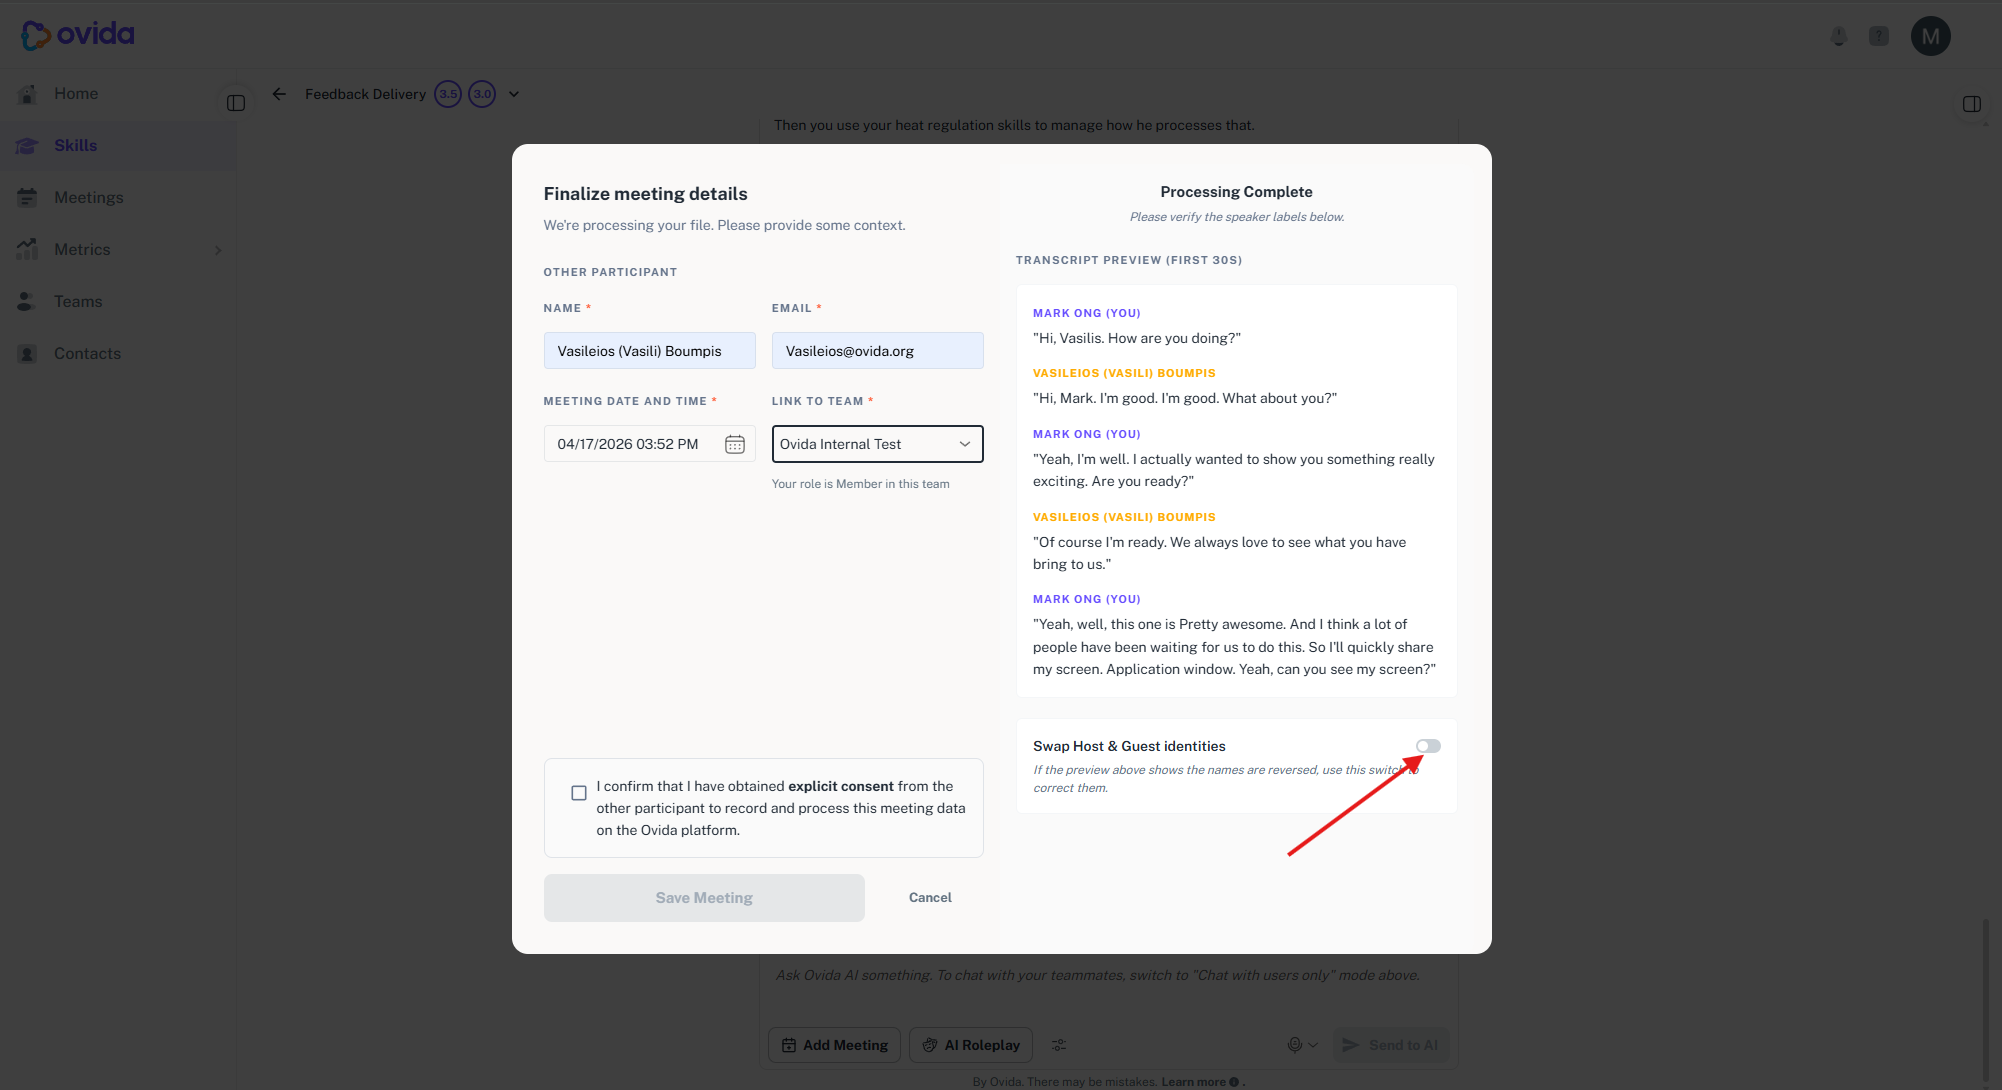
Click Save meeting.
Wait for processing to complete. A one-hour video typically takes about 30 minutes to process. The meeting status will change to "View" and you'll receive an in-app notification and email when processing is complete.
⚠ If you close the browser before saving, the file is deleted within 8 hours and nothing is kept. Incase you run into trouble or having issue uploading your meeting, contact support@ovida.org or submit a ticket via chat widget that can be found at the bottom right corner of your screen.